Steam, Rinse, Photograph
- Carrie Wright
- May 25, 2018
- 6 min read
Updated: Jun 3, 2018
This is the third and final post of the three part series about my process, which began with Nuts and Bolts. I've been hesitant to share these details with you because it includes all of the behind-the-scenes not at all sexy details of how my silk paintings are finished in a completely DIY way. I pray it does not make you feel that my work is less desirable. Rather, my hope is that you will appreciate the organic and accessible way my silks are created. In highly marketable terms, we call this "slow fashion." In my language: "rigged!"
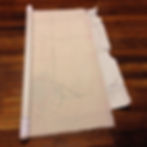
Dyes that offer the highest saturation of color require a steam setting process in order to make them colorfast. High temperature heat and pressure produced by steaming bonds dye and silk molecules together. Steam involves water. Silk cannot get wet prior to being colorfast or the dyes will run. In addition, silk dyes can bleed during steaming. The solution is to wrap or roll the silk between layers of newsprint and absorbent fabric which act as a blotter. I've seen different techniques for this, but my method is to use one layer of newsprint, followed by an old 100% cotton sheet, the silk painting, then another layer of cotton sheet. This flat sandwich then gets carefully rolled up into a tube, a difficult process when space is limited, the curious cat decides he wants to help, and I'm on my old lady hands and knees working on the freshly vacuumed floor! The layers need to stay flat and wrinkle-free during the rolling because steam setting can permanently crease delicate silk fibers. Typically, there are some expletives uttered to help this part of the process along, but I am not necessarily recommending you use them.
Here's a photo of a roll. The marks you see on the sheet are from a previous banner project, not the one being rolled up in the photo. This gives you some idea of the purpose and importance of the cotton sheet "blotter."

Steam setting is not a complication if a person is making small items, such as scarves and handkerchiefs. A large stock pot can be used on top of the stove in a creative way, such as Jacquard suggests on their website here. However, when I started making large scale banners, fitting a 55"x90" silk painting into a pot was not an option!
After more internet research, I learned some dyes are formulated to be set by a chemical fixative. This seemed like the perfect solution because the type and size of professional steamer I would need costs, at a minimum, $1500, an amount far beyond my hobby budget. When my first chemically set painting turned out faded, muted and diminished, and after I got done fuming and pouting over it, I did more research. Professional electric steamers are not necessarily highly technical pieces of engineering marvel. They hold water, have a heating element in order to boil the water to produce the steam, are sealed up properly so that no steam escapes, and have a time and temp setting. hmmmmm
This is what I came up with as a solution: a rice cooker, 5' stove pipe, furnace tape = $50.
In the first photo, you see the small rice cooker as the base. It has it's metal pot inside, and taped to that is a plastic veggie steamer basket that came with a different rice cooker I use for our meals. That basket is just big enough that it fits perfectly inside the ridge on the pot where a lid would typically sit. The stove pipe then fits onto the ridge of the steamer basket. I use the steamer basket to help prevent boiling water from splashing up onto my silk roll, and also to give the steam droplets a place to form so that they don't form on the end of my roll. I use furnace tape to completely seal up all the layers, then wrap a dish dowel at the base as added protection (see first photo of this post). I periodically un-tape the contraption to clean the lime out of pot. Before each steam, I pick up the whole rig and slosh it around to hear how much water is left inside. If it sounds like it needs more water, I pour some down the pipe. Isn't this such a technical process?!
The second photo depicts how I've tethered the pipe to the wall with a scrap piece of silk. I've mentioned before that our house is very old. Nothing is level! I don't trust the thing to not topple over. Plus, as you can see in the third photo, the roll needs to hang straight down without touching the sides of the pipe because water droplets form on the sides of the pipe during steaming. That's just a metal kabob skewer poked through the newsprint at the end of my roll, which is how the package hangs on the notches I cut in the top of the pipe. Also, the top of the pipe has a couple of layers of tape around it just as an added protection against snares and cuts from the sharp metal edge. Last, the whole thing is topped off with a crib blanket, seen below, a perfectly sized cap which simultaneously holds in steam and quickly absorbs any water droplets that might otherwise drip down onto my roll.

After steaming for roughly three hours, I remove the silk from the roll and allow it to sit for several hours, usually overnight, before rinsing. Rinsing simply removes excess dye and insures my scarves don't bleed on you if you're caught in a rain storm. It does not diminish the color saturation in the least. Rinsing also removes any water-based gutta and antifusant I've used during the painting process. (See last week's post, Silk Painting 101, for more on that.) I use a gentle textile detergent that helps suspend dye so that whites stay white and colors stay true. I finish off with a quick rinse in hair conditioner which helps restore the softness of the silk. Ahem, yes, that is conditioner from a home hair dye kit. Thankfully, my old house came with a mud room sink, perfect for my needs!

I wrap the silk in a big beach towel to gently press out excess water, then carefully iron the silk while it is still damp. (For banners, all of the hemming is finished off at this stage, but let's save that for another post.) Now the finished piece gets photographed for the website, which is as complicated as throwing a white sheet onto my dining room table and setting up one light kit. The difficulty is always with Penny the cat, not the lighting! He simply loves photo shoots and insists on rolling around on the sheet until I give him lots of love and take several photos. This is great for cute Instagram posts, but does slow down the procedure. I have a cheap dress form mannequin I threw a white tee over for taking better shots of the scarves being worn. You can see here the sliver of wall space I'm shooting against in my house. I even have a piece of art work I take off the wall each time. The light kit and dress form live in my tiny studio office when not in use.

Every photo is taken with my iPhone then Photoshopped for accuracy. I never use Photoshop to correct mistakes in my work or to trick you. The photo above is completely untouched. As it appears in my store here, I have simply cropped it and minimally adjusted the exposure so that the colors are more precisely represented. I'm always attempting to make my photos look EXACTLY like what my eye sees. I am probably overly paranoid that someone will be disappointed by the work they receive from me.
Thus, our three part series through my merry wonderland is concluded. As always, ask questions and let me know if there's anything you'd like to learn about what I'm doing. Thanks for following along, and I hope it's been fun for you to read and see!


